A Case Study on the MP-3 in a Retina and Low Vision Practice
BACKGROUND/PURPOSE
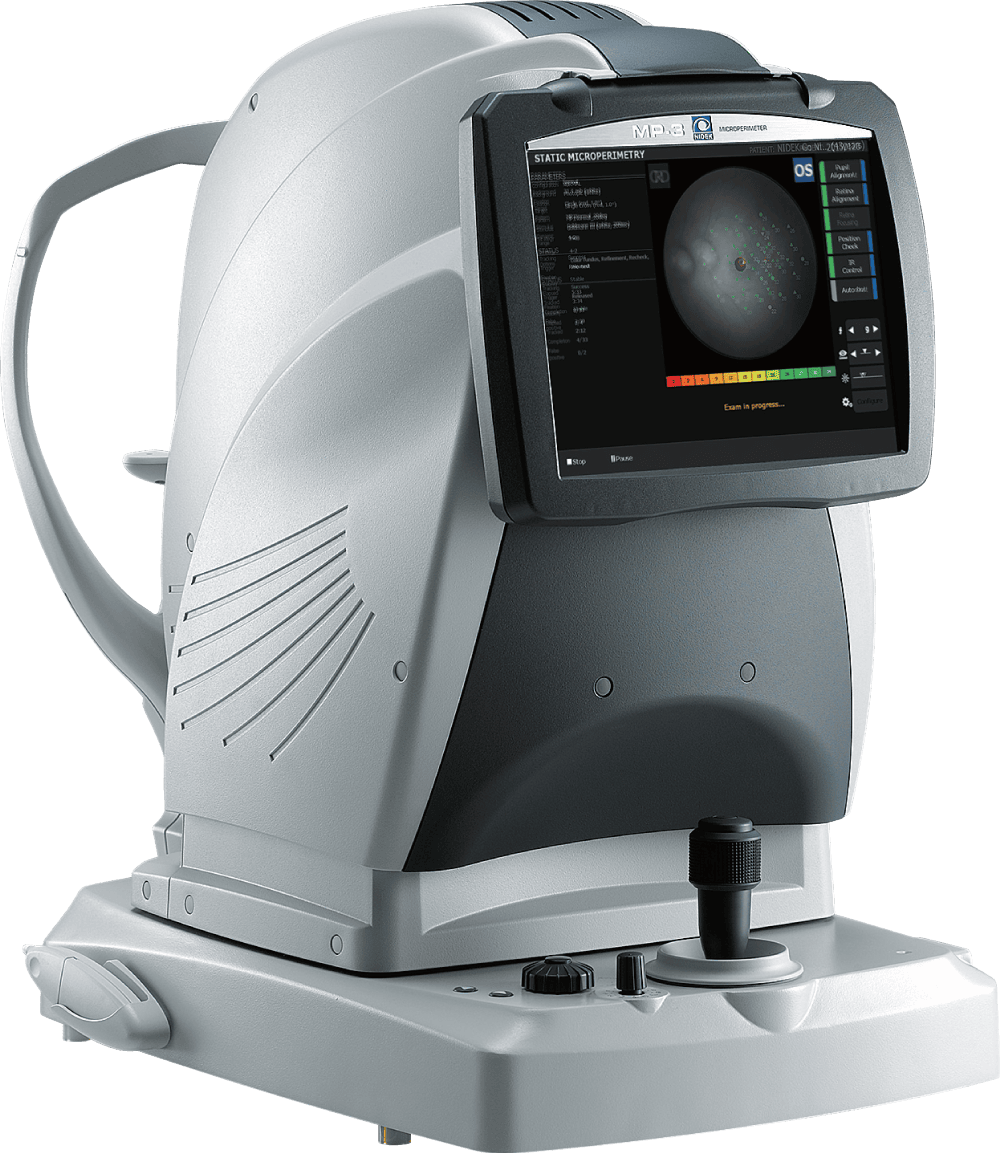
Central vision loss can be caused by congenital or acquired retinal disease including ARMD. Our retinal doctors at MOORE EYE INSTITUTE treat the retinal disease and the patient’s functional needs are treated during the low vision evaluation. One method of achieving clearer vision is to enlarge the image through magnification both at distance and near but the field of vision will also be reduced. Some patients are able to eccentrically view around the central loss but it is still difficult for them to locate the preferred retinal loci (PRL) and even more difficult to consistently find it. The purpose of this study with the NIDEK MP-3 is to identify the best eccentric viewing posture in ARMD patients and rehabilitate these patients to locate it consistently with the biofeedback training. This treatment plan allows the patient to be seen by their low vision optometric specialist and the retinal doctor without any additional therapists or traveling to any other locations.
METHODS
Each participant received a complete ocular examination including visual acuity (Snellen and SOSH low vision chart), retinoscopy and ophthalmoscopy. For those patients treated with injections for wet ARMD, the patient had to have no evidence of retinal active findings (SMR, SRF or heme) for at least three consecutive months. The ophthalmic technician performed an initial baseline retinal sensitivity analysis on the NIDEK MP-3.
Various light intensities are presented on the MP-3 and the patient responds with a clicker, similar to what is used on standard visual field test equipment. Stimulus intensity is measured in decibels (0-34). A high score indicates the patient’s ability to detect a dim stimulus and therefore a higher or better retinal sensitivity. A low score signifies poor sensitivity and manifests as a scotoma.
In the examination room, a low vision optometrist determined an eccentric viewing posture using a clock dial technique. It is an arduous process and has inconsistent results. The MP-3 can be used with these clock dial results to support them or it can locate the retinal position of preferred eccentric viewing independently. It is far more accurate, less time consuming and easier for the patient to be tested on the MP-3. Many patients had previously undergone OCT and Swept Source OCT. The retinal specialist compared the OCT with the MP-3 to check if they correlated. The sensitivity results can be documented and the rehabilitation process will be much more valid. After an eccentric viewing posture is determined, the low vision specialist delineated the area on the MP-3 for these patients to be trained to eccentrically view to that position. They receive auditory feedback when they locate the previously documented point. The patient was asked to move fixation to the trained area, then a flickering checkerboard in the trained area was presented and the patient was instructed to look away, and then have to locate the predetermined area of trained fixation. When the patient was successful, a constant beep would sound – the auditory feedback. This process was repeated several more times when the patient would look away and have to locate it on their own.
RESULTS/DISCUSSION
Our test participants consisted of 50 ARMD patients currently seeing doctors in the practice and who were willing to perform the MP-3 visual field test. We encountered many variables: visual acuity, cognitive ability, the duration, and severity of retinal disease and the ocular media. After 100 trials of the test, it was concluded our most successful patients had very reduced acuity in one eye (worse than 20/400) and moderately reduced acuity in the other eye (worse than 20/70). It was determined that their ability to understand the test also affected their performance on the biofeedback component. The patient needed to associate the auditory confirmation with the eccentric viewing posture. The challenges on repeated testing were financial, transportation and desire. Previously patients with central vision loss were taught by therapists to eccentrically fixate over many visits. The MP-3 accomplishes this in the doctor’s office, without the variability of different examiners and is far more efficient for the patient.
The benefit of this test is that the results are reproducible. They can be repeated on the same retinal location at different times to measure long term retinal function and correlate that with structural changes. The entire process can be completed in 10 minutes. Standard visual acuity measurements are not an accurate method of monitoring reduced central vision loss. Although the visual acuity may not have improved with many of the patients, it remained stable and their ability to return to the eccentric viewing posture was constant. Another less obvious advantage to the MP-3 testing is the psychosocial component. ARMD patients often feel they are not in control of their ocular prognosis. This procedure builds their confidence and they feel they are involved in their functional improvement. The NIDEK MP-3 provides the optometrist, low vision specialist, and the retinal doctor with the valuable data regarding the progression and rehabilitation of this disease. It is an accurate, efficient, and reliable piece of equipment to include in all offices.
CONTRIBUTORS at Eye Moore Institute in Pennsylvania
- Georgia Crozier, OD, MS
- Leonard Ginsburg, MD
- Shyam Kodati, MD
- Deepaki Malik, MD
- William Davis, COA
Video transcript
[0:00–0:12] Intro music.
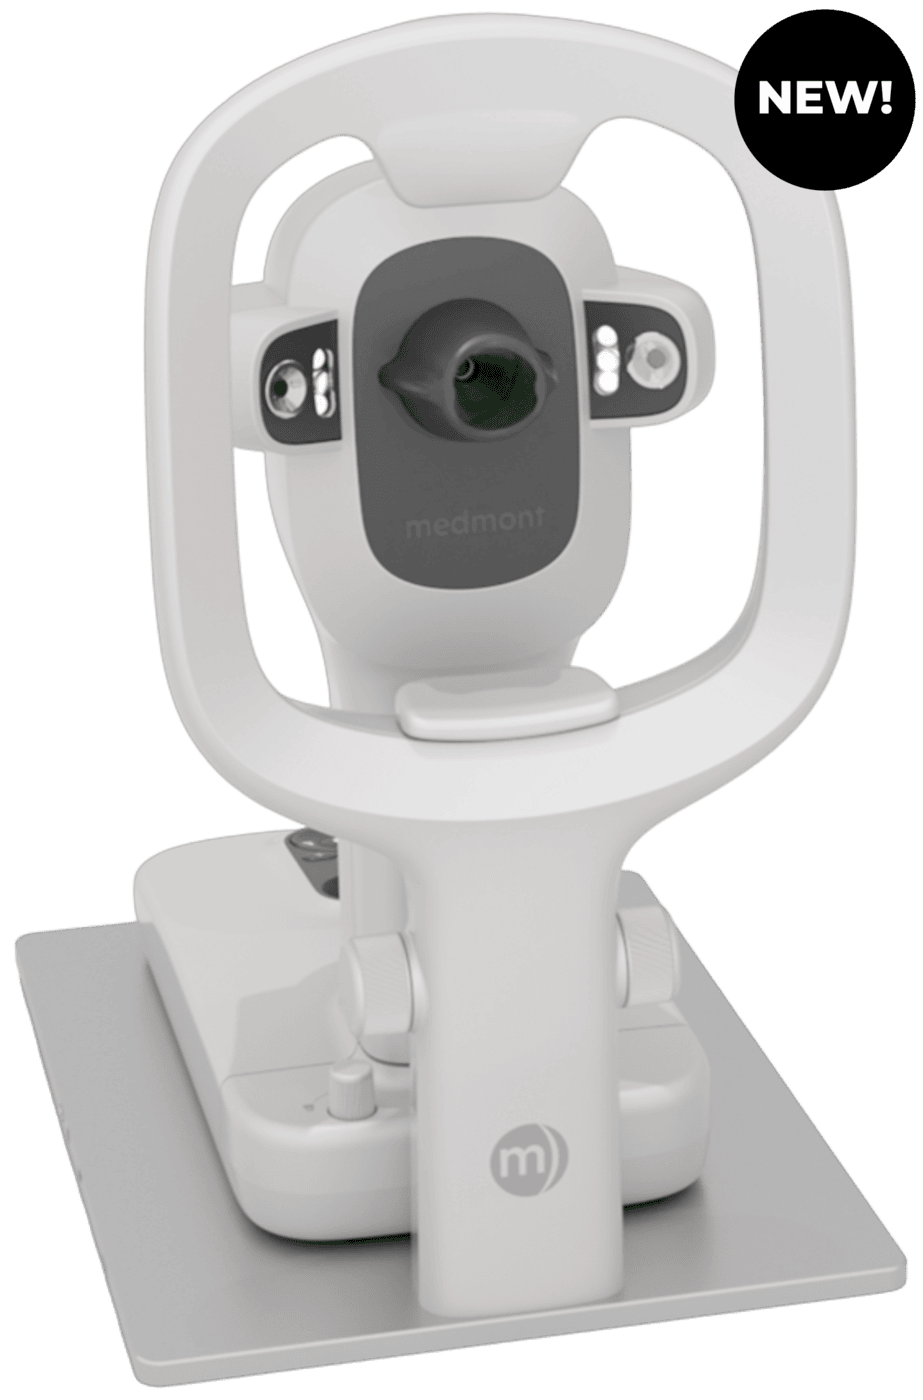
Hello, my name is Keith Effert with Nidek. Today I'm going to provide a brief demonstration on the Nidek MP-3 microperimeter.
So now I'm going to show you the MP-3 touchscreen control panel. As you can see we have these four icons. We have microperimetry — once I select either a pattern that I would like to start the exam or if I go to my default pattern, in microperimetry you're going to get the fixation analysis, you're going to get the patient's visual field or microperimetry exam and sensitivity level. And we'll also take a color fundus photo at the end.
Now if you just want to utilize the MP-3 as just a retinographer, you can just click on this icon here for just only color retinography. Or if you want to track patient's fixation to see if the patient's fixation is stable, relatively unstable, or unstable. And then we also have our biofeedback rehabilitation program. Down here on the bottom left-hand corner, this is the shutdown — this is going to shut down the operating system on the microperimeter. Patients tab where you can select patients or enter a new patient. Exams tab where you can look at the patient's exams. And then the settings tab — settings tab is where you're going to change the settings for each one of these.
So now I want to show you the main body controls. We have a joystick — you can turn it right and left, that's going to move the MP-3 main body unit up and down. We also have the joystick that you make micro movements in and out, side to side. And we also have this motorized ring, and this ring is more for your macro movements — left and right, in and out, and your micro movements in and out. Also this is the infrared control lamp — you can adjust the infrared so you can see the fundus image in real time with more illumination or less illumination. This is the chin rest that is up and down. And then we also have a manual focus knob and a manual jump from the anterior segment of the eye to the retina.
Now what I'm going to do is show you how to create a customized pattern by going into options and MP pattern editor. Now these are all the factory patterns that have been sent with the microperimeter — these cannot be permanently altered, however you could use one of these as a template and remove or add more stimuli. Now if you want to create your own pattern, we're going to click on New. I'm going to create just a quick demonstration pattern — I want my attenuation to be up around 28 because this is really going to be for training purposes. I'm going to put a mark at four degrees, four degrees, four degrees, and another four degrees here. Now we're going to save that as "test" for this demo, and now we have a customized pattern that I created myself.
So now I'm going to show you how to transfer over the demo pattern that I customized in our Navis-EX software. To do that we're going to go into our settings tab on the bottom right-hand corner, into Exams, and then select Static Microperimetry. On the dropdown box we have static microperimetry settings, retinography settings, fixation settings, and feedback settings — this is where you're going to change your default settings for each one of the exams that you're going to transfer over from Navis-EX into the main body of the microperimeter. So we're going to stay in microperimetry, click New at the bottom right-hand corner, go up to the pattern name, change it from the factory name, and select the demo pattern that I created — you can see the four stimuli I created over Navis-EX, and select "Select." I'm also going to change the dB attenuation starting point to about 28, because again this is just for demonstration purposes — you would set the dB attenuation starting point depending on what your patient's visual acuity is per exam. Now I'm going to click Save and save it under the same name, "demo." Now that it's been saved, if I go back home and into my favorite settings, you will now see that the demo pattern is here, and I can select that and start my exam directly from my favorites menu.
Now that I've created a customized pattern named "demo," I'm going to show you how to enter a new patient and take an examination. I'm going to select Patients on the bottom left, go to the next one, type in their ID, click OK, enter first name and last name, and click Save. That patient will be highlighted in blue — I'm going to click Select, and the patient's name appears at the top. Now I'm going to select that demo pattern I created from my favorites under microperimetry — you can see the four stimuli I created. Now I'm going to select Start Exam.
At this point I'm going to place the patient's chin in the chin rest, forehead against the forehead rest, have them open their eyes, and select the right eye. At this point you want the purple line to bisect the patient's pupil — I'm going to bring the patient's chin down so we're bisecting the pupil, and select OK. Now have the patient open as wide as they can, because we want to see those six white focusing dots. Now we're going to focus onto the retina using infrared light. At this point I can move the fixation target — if I move the fixation, the patient moves their eye. Otherwise, if they can't see it, we can change the size and shape under Configure — I can change the shape to a circle, four crosses, or four lines, change the color, thickness, brightness, and size. As you can see, if I select five degrees the fixation target gets larger for the patient. Once you're finished, click Done.
Now I'm going to select OK, and we're going to look for a tracking reference — the MP-3 utilizes the whole 45-degree infrared fundus image as the tracking reference. Once the coordinates have been completed, the demo pattern is now placed onto the patient's fundus — the square is bisecting the patient's pupil or their fovea. You can move this eccentrically if you'd like, or leave it defaulted.
Now we're going to start the exam. I'm going to have the patient have their thumb on the trigger, and tell them they're going to see different levels of light — dark and bright. We're going to start in 3, 2, 1 — click OK. Now as the exam progresses, you can see this arrow pointing up, meaning the patient saw the intensity of the stimuli and it's going up 4 decibels on the attenuation scale. If they didn't see it, the arrow points down. If it turns into a circle, that is their sensitivity threshold level. The exam is now completed, so I will not add any more stimuli, but you can add additional ones if you'd like — we can say No.
Now we're going to take a color fundus image — open wide. The patient had a nice color fundus image, so we don't have to retake it. Now we're going to look at the checkerboard pattern, because it shows us the blood vessels on the color fundus photo and the vessels on the infrared photo — we want to make sure they're in alignment, because we're going to be overlaying the microperimetry results onto the color fundus image as they were taken on the infrared. We're going to click Accept, and these are the final results — click Accept one more time.
So with the Nidek MP-3 microperimeter, we can follow up on a baseline exam accurately because we have a 30-hertz eye tracker. To do that, we select the patient we want to follow up on from a previous baseline exam, go into their exams, select the exam we want to follow up on, and click the Follow Up tab on the bottom right. Just like before, the MP-3 automatically aligns and jumps to the back of the eye and focuses — but now it knows which eye we're doing because it was selected as the baseline exam. Again we bisect the pupil with the purple line, select OK, have the patient open as wide as they can — again we want to see the six white focusing dots. It automatically aligns and jumps back to the retina and focuses. At this point we could change the fixation but we're not going to; if we wanted to we can go into Configure — select OK. Now we're finding the tracking reference again, the whole 45-degree infrared fundus image. At this point we have the checkerboard pattern again, but the purple is the baseline and the infrared is the current patient's image — we make sure the blood vessels are in alignment. Then before we click Accept, we tell the patient again we're going to start the exam — different levels of light intensity, press the button when you see it. We start in 3, 2, 1 — Accept. Because we're starting at the patient's baseline threshold sensitivity, the exam time will be cut much shorter compared to starting a baseline exam, unless there is more severe disease. And now we're finished — we're not going to add any more stimuli, select No. We take another color fundus image — open wide, don't blink. We look at the checkerboard pattern again, make sure the blood vessels are aligned, click Accept, and Accept one more time to send the results to Navis-EX software.
The Nidek MP-3 microperimeter also has a rehabilitation feedback exam. At this point we can try to have the patient use a different part of their retina that may be higher in sensitivity, to give them better vision. We select our patient, then select the exam we want to use for the feedback, to establish what parameters and location we'd like to use. Viewing the patient's sensitivity here, this patient has relatively good to very good sensitivity and stable fixation. To do a feedback exam, click the plus side and go into Feedback — assess the patient sensitivity, select the desired PRL (preferred retinal locus) center. If sensitivity is low in this area, we can train the patient to use a different area of the retina — say, one with higher sensitivity that could help them gain some vision. Once finished, select Done, then select the exam — the flickering checkerboard is used to help stimulate the patient's brain.
We start the exam — since we selected the right eye, the microperimeter knows which eye we're examining. Select OK. Patient opens wide, six white focusing dots, nice and round. It jumps to the back of the eye and focuses. We can edit the fixation target, but we'll select OK at this point without editing. We find the tracking reference — the whole 45-degree infrared image — and make sure the retinal vessels are in alignment with the color photo and infrared. We click Accept.
Now this is the location selected on the patient's microperimetry exam as their trained retinal locus (TRL) — we can edit it if we want, but we'll leave it as is and select OK. This is the checkerboard pattern the patient will see when they hit that TRL target. In the settings tab you can change the checkerboard radius or number of sides — two, four, or eight degrees — and the square side size (half a degree or one degree) and the frequency of flicker. We'll leave the current settings.
Now starting the exam: the patient is guided to look down slightly, then a little to the left, and told to stay there. Once they hit the target, they get a clear, single tone; when they look away, they hear beeps that get closer together as they get nearer to the target. The process is repeated a few times, guiding the patient back to the fixation target until they consistently hold the solid tone. We then stop the test.
Depending on how you want to train your patients, this can be repeated over multiple visits with the exact same test, and can also be performed as a follow-up using the exact same parameters as the baseline. From here, we accept the results, and the data is sent to Navis-EX.
Now that the microperimetry results are stored in Navis-EX, we look at the results by double-clicking on the microperimeter entry. At the top we have the parameters and results from the examination, along with several icons: one switches between the infrared and color image; another removes the fixation target from the color fundus image; there's a grid view; and a heat map of fixation showing where the patient looked and looked back to the fixation target. We also have fixation analysis and stability — a 2-degree and 4-degree circle giving the percentage of the patient's fixation within that range, and whether it's unstable or relatively unstable. There's also the bivariate contour ellipse analysis. We can remove or show the stimuli points, with or without the decibel number labels — as shown here, 28 decibels attenuation. We can also look at a simulation map of the shape and size of the scotoma, and look at the average sensitivity within a hand-drawn polygon — in this case, the mean sensitivity within the polygon is 29.3.
[19:38–20:06] Outro music.
For more info about the NIDEK MP-3 Microperimeter, visit: https://usa.nidek.com/mp-3